You’ve just unboxed your new monitor, proudly advertised with an "HDR" sticker on the bezel. You’ve heard the hype: High Dynamic Range is supposed to be a visual revolution, delivering breathtaking contrast and lifelike colors. You plug it in, enable the HDR setting in your OS, and lean back, ready to be amazed. Instead, you’re met with a dim, washed-out, and strangely flat image that looks significantly worse than the standard mode you were just using.
As a display technology specialist who has spent over a decade calibrating and testing hundreds of monitors, I've seen this exact scenario play out countless times. This isn't a faulty product; it's a feature working as designed. You've just experienced the frustrating reality of what I call "Fake HDR."
This guide is born from that widespread disappointment. We're going to pull back the curtain on one of the most misleading marketing terms in the tech industry. You'll learn the fundamental hardware requirements for true HDR, why budget monitors are physically incapable of delivering it, and how to arm yourself with the knowledge to avoid paying a premium for a feature that actually degrades your picture quality.
What is True HDR? The Three Pillars of a Great Image
Before we dissect the failure, we must understand the promise. True High Dynamic Range isn't just a software setting; it's a fundamental upgrade to a display's physical capabilities. It aims to more closely mimic how our eyes perceive light and color by dramatically expanding three key areas.
- Peak Brightness: The ability to produce incredibly bright, intense highlights, like the glint of sunlight on water.
- Black Levels: The ability to produce deep, inky blacks. The massive difference between the brightest brights and darkest darks creates a high contrast ratio.
- Wide Color Gamut: The ability to reproduce a much wider range of colors than standard displays, showing deeply saturated reds, greens, and blues.
When these three elements work together, the result is transformative. But when a monitor can't deliver on all three, the entire system collapses.
The Anatomy of "Fake HDR": Why Your Budget Monitor Looks Worse
The core problem is that many budget monitors are merely "HDR-compatible." They can accept an HDR signal, but they lack the underlying hardware to display it correctly. This forces the monitor to make ugly compromises that ruin the image.
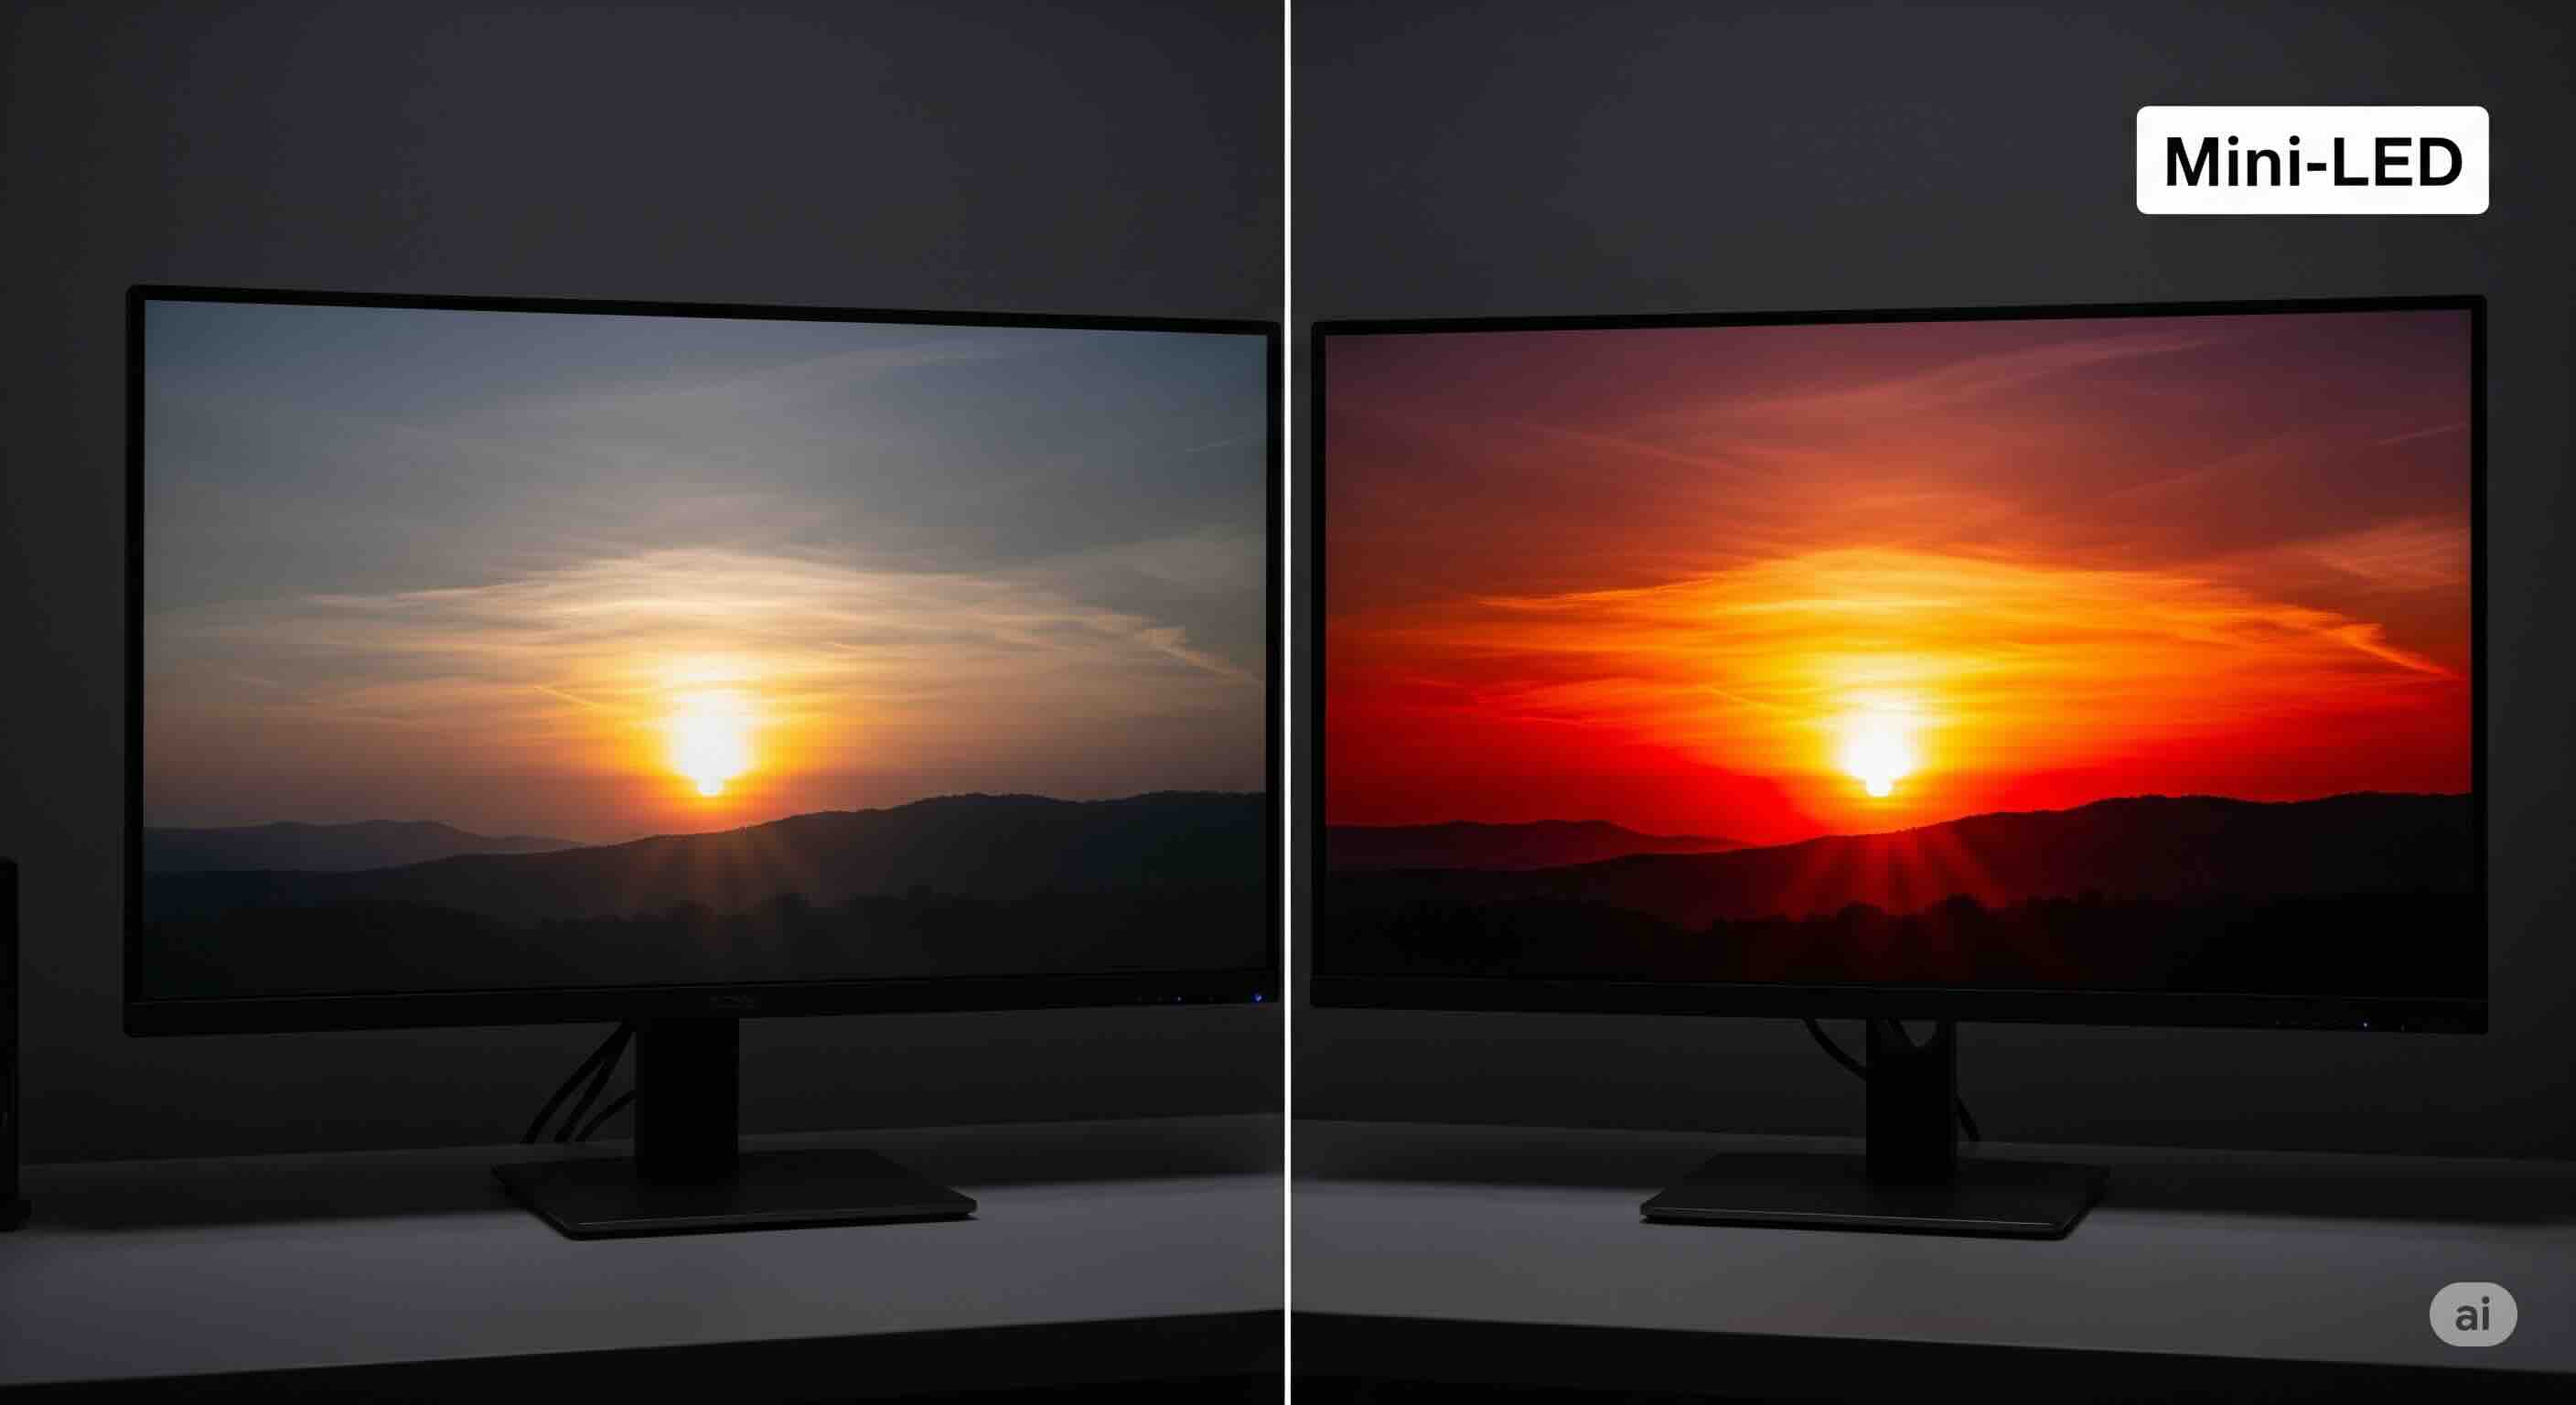
The Contrast Catastrophe: The Critical Lack of Local Dimming
This is the single most important reason why budget HDR fails. In a standard LCD monitor, the entire screen is illuminated by a single backlight. To show a bright object on a dark background, a true HDR display uses Local Dimming, dividing the backlight into many independent zones that can be brightened or dimmed individually.
Budget monitors have no local dimming. When they receive an HDR signal that calls for a bright highlight, their only option is to increase the brightness of the *entire* backlight. This has a disastrous effect: the bright highlight gets a little brighter, but the dark parts of the image are flooded with light, turning deep blacks into a washed-out, milky gray. The overall contrast is destroyed. You can get a sense of your monitor's poor backlight control by running a Backlight Bleed Test in a dark room.
The Brightness Problem: The DisplayHDR 400 Myth
Many of these disappointing monitors carry the VESA DisplayHDR 400 certification. While it sounds official, this is the lowest tier and, in my professional opinion, should not be considered true HDR. It requires a peak brightness of only 400 nits, which is barely brighter than a good SDR monitor. This is simply not enough to create the stunning "specular highlights" that define the HDR experience.
The Color Confusion: Poor Tone-Mapping and Gamut Issues
The final nail in the coffin is tone-mapping. An HDR signal contains a huge amount of brightness and color information. Budget monitors with cheap processors handle this poorly. They might "clip" highlights, turning detailed bright areas into flat white patches, or "crush" blacks, losing detail in shadows. Colors can also become wildly inaccurate as the monitor struggles to display a wide color gamut it can't physically reproduce. If you suspect your colors are off, running a comprehensive Color Test can help you identify these issues.
| Feature | "Fake HDR" (e.g., DisplayHDR 400) | Real HDR (DisplayHDR 600+) |
|---|---|---|
| Local Dimming | No. This is the critical failure. | Yes. (Edge-lit, FALD, or Mini-LED). |
| Peak Brightness | ~400 nits (barely brighter than SDR). | 600 nits minimum, 1000+ nits is ideal. |
| Wide Color Gamut | Not required (often just standard sRGB). | Required (typically >90% DCI-P3). |
| Typical Result | A washed-out, low-contrast image that looks worse than SDR. | A vibrant, high-contrast image with impactful highlights. |
Decoding the DisplayHDR Logo: A Quick Guide
VESA's certification ladder can be a useful tool if you know how to interpret it. The number in the logo refers to the monitor's peak brightness capability.
- DisplayHDR 400: Avoid. This is "HDR-compatible" only. It will almost always look worse than good SDR.
- DisplayHDR 600: The absolute minimum entry point for a taste of real HDR. It has local dimming, but it's often basic and can have visible blooming.
- DisplayHDR 1000 / 1400: This is the real deal. These monitors use advanced backlight technology (FALD or Mini-LED) to deliver a powerful, high-contrast, and transformative HDR image. As we've detailed in our full HDR certification guide, these higher tiers represent the true baseline for a premium experience.
Conclusion: Stop Paying for a Sticker, Invest in Performance
The hidden cost of "budget HDR" is not just the small premium you might pay for the feature; it's the significant degradation of your visual experience. By trying to display a rich HDR signal without the proper hardware, these monitors produce a washed-out, low-contrast image that is a pale imitation of what both HDR and even good SDR can be.
The takeaway from my years of testing is simple and unequivocal: a great SDR experience is infinitely better than a bad HDR experience. Don't be swayed by a misleading "HDR" sticker on a budget monitor. Instead, arm yourself with knowledge. Look for the specifications that actually matter: a high peak brightness (600 nits, ideally 1000+), a wide color gamut (>90% DCI-P3), and most importantly, effective local dimming.
Until the technology required for true HDR becomes dramatically cheaper, "budget HDR" will remain a myth. Save your money, ignore the marketing hype, and invest in a monitor that delivers excellent performance in standard mode. Your eyes will thank you.