Introduction: Why Your "Perfect" Monitor Still Looks Wrong
You’ve done it. After hours of research, you’ve finally unboxed and set up your brand-new monitor. It promises a world of vibrant, lifelike colors. Yet, as you open your favorite photos, you’re met with a sinking feeling. The skin tones look slightly off, the sky isn't the shade you remember, and the image you meticulously edited on your old screen now looks completely different. What went wrong?
Welcome to the universal, yet often overlooked, world of monitor calibration. The truth is, virtually no monitor is perfectly accurate right out of the box. Due to manufacturing variances and different panel characteristics, what your screen displays can be a far cry from the "correct" industry-standard colors. This isn't just a problem for professionals; it affects everyone.
As a display technology expert with over a decade of hands-on testing, I can tell you that calibration is the single most impactful step you can take to unlock your monitor's true potential. It's the bridge between what the creator intended and what you actually see. In this definitive guide, we will demystify the entire process. We'll explore why it's non-negotiable for gamers, creators, and even casual users, and walk you through a step-by-step process for both free software methods and professional hardware solutions. It's time to stop guessing and start seeing color as it was meant to be seen.
Why Monitor Calibration is Non-Negotiable for Everyone
Many people assume monitor calibration is a complex ritual reserved only for high-end photography studios. This couldn't be further from the truth. An uncalibrated monitor is like an un-tuned instrument—it might make a sound, but it won't be the right one. Here’s why taking the time to calibrate is crucial, no matter who you are.
For Photographers, Designers, and Video Editors: The Foundation of Your Craft
For any creative professional, color is your language. An uncalibrated screen introduces a critical point of failure in your workflow. If your monitor displays reds as overly saturated, you might compensate by desaturating them in your edit. The result? When you send that image to a client or to print, it looks dull and lifeless. Calibration ensures what you see is what you get (WYSIWYG). It guarantees that the colors on your screen are a faithful representation of the data in your file, leading to consistent, predictable results across different devices and print media.
For Gamers: Seeing the Game as the Developers Intended
Game developers spend countless hours meticulously crafting the visual atmosphere of their worlds. An uncalibrated monitor can completely undermine that vision. If your screen's gamma is too dark, you'll suffer from "black crush," where crucial shadow details are lost, making it impossible to spot an enemy lurking in a dark corner. Conversely, if it's too bright or washed out, the game loses its intended mood and contrast. Proper calibration ensures you experience the game with the intended color palette and gain a competitive edge by seeing every detail clearly.
For Everyday Users: A More Accurate and Pleasant Viewing Experience
Even if you don't edit photos or play games, calibration matters. When you're shopping online, you want the color of that sweater to be accurate. When you're watching a movie on Netflix, you want the director's carefully graded color scheme to come through. A calibrated screen provides a more comfortable, true-to-life viewing experience for everything you do, from browsing websites to video chatting with family.
Before You Begin: The Pre-Calibration Checklist
Jumping straight into calibration without proper preparation can lead to inaccurate results. To ensure a successful and meaningful calibration, follow these essential preliminary steps. Think of this as preparing your canvas before you start painting.
- Let It Warm Up: Just like any electronic device, a monitor's color and brightness output can drift as it reaches its stable operating temperature. Turn on your monitor for at least 30 minutes before starting any calibration process.
- Reset to Factory Defaults: Dive into your monitor's On-Screen Display (OSD) menu and find the option to reset all settings to their factory defaults. This gives you a clean, neutral baseline to work from, free of any previous, potentially incorrect adjustments.
- Control Your Ambient Lighting: Your perception of color is heavily influenced by the light in your room. For the most accurate results, calibrate your monitor in the same lighting conditions you typically work or play in. Avoid direct sunlight or bright lamps shining on the screen. Dim, consistent, and neutral lighting is ideal.
- Clean Your Screen: A simple but crucial step. Dust, smudges, and fingerprints can interfere with the calibration process, especially when using a hardware device. Use a clean, soft microfiber cloth to gently wipe down the screen.
- Set Correct Resolution and Refresh Rate: Ensure your computer is outputting at your monitor's native resolution (e.g., 2560x1440 or 3840x2160). Also, confirm it's running at its highest supported refresh rate. You can easily verify this with an online Refresh Rate Test to make sure you're getting the smoothness you paid for.
The Two Paths to Color Perfection: Software vs. Hardware Calibration
There are two primary methods to calibrate your monitor. The first is a free, software-based approach that's a great starting point for anyone. The second is a hardware-based method that offers unparalleled accuracy for professionals and enthusiasts.
Method 1: Software Calibration (The Good-Enough Free Method)
Software calibration relies on your own eyes to make adjustments. It uses built-in operating system utilities that guide you through a series of test patterns. These tools don't change the monitor itself; instead, they adjust your computer's graphics card output (its Look-Up Table or LUT) to compensate for the monitor's inaccuracies. It's not perfect, but it's a massive improvement over doing nothing.
Step-by-Step Guide for Windows (Display Color Calibration):
- Type "Calibrate display color" into the Windows search bar and open the utility.
- The wizard will guide you through adjusting gamma, brightness, contrast, and color balance.
- Gamma: You'll see a series of circles with small dots in the middle. Adjust the slider until the dots are as invisible as possible. This sets the mid-tones correctly.
- Brightness & Contrast: Use your monitor's physical OSD buttons for this part. Adjust brightness so you can distinguish the shirt from the suit in the test image without washing out the black background. Then, adjust contrast to ensure the whites are bright but still show details like wrinkles and buttons.
- Color Balance: You'll be shown several gray bars with a color cast. Use the red, green, and blue sliders to remove any tint and make the bars appear as neutral gray as possible. This is the most subjective step.
- Once finished, you can compare your "Previous" and "Current" calibration. The new version should look more neutral and balanced. Save the new profile.
Step-by-Step Guide for macOS (Display Calibrator Assistant):
- Go to System Settings > Displays. Select your monitor, then click the "Color Profile" dropdown and choose "Calibrate..."
- The assistant will launch. Be sure to check the "Expert Mode" box for more control.
- The process will guide you through setting a target gamma (usually 2.2 for general use) and a target white point (D65 is the standard for web and video).
- You'll adjust sliders based on visual test patterns, similar to the Windows process.
- Name and save your new profile. macOS will automatically set it as the default for your display.
To get a better visual sense of what you're adjusting, it can be helpful to have a reliable reference open. Use an online Color Test tool on one half of your screen while you adjust settings. This provides full-screen color patterns that make it easier to spot issues like color banding or inaccurate hues. While you're at it, remember that calibration can't fix underlying hardware flaws. A quick Backlight Bleed Test can help you identify uniformity issues that you'll need to live with, regardless of color accuracy.
Method 2: Hardware Calibration (The Professional Standard)
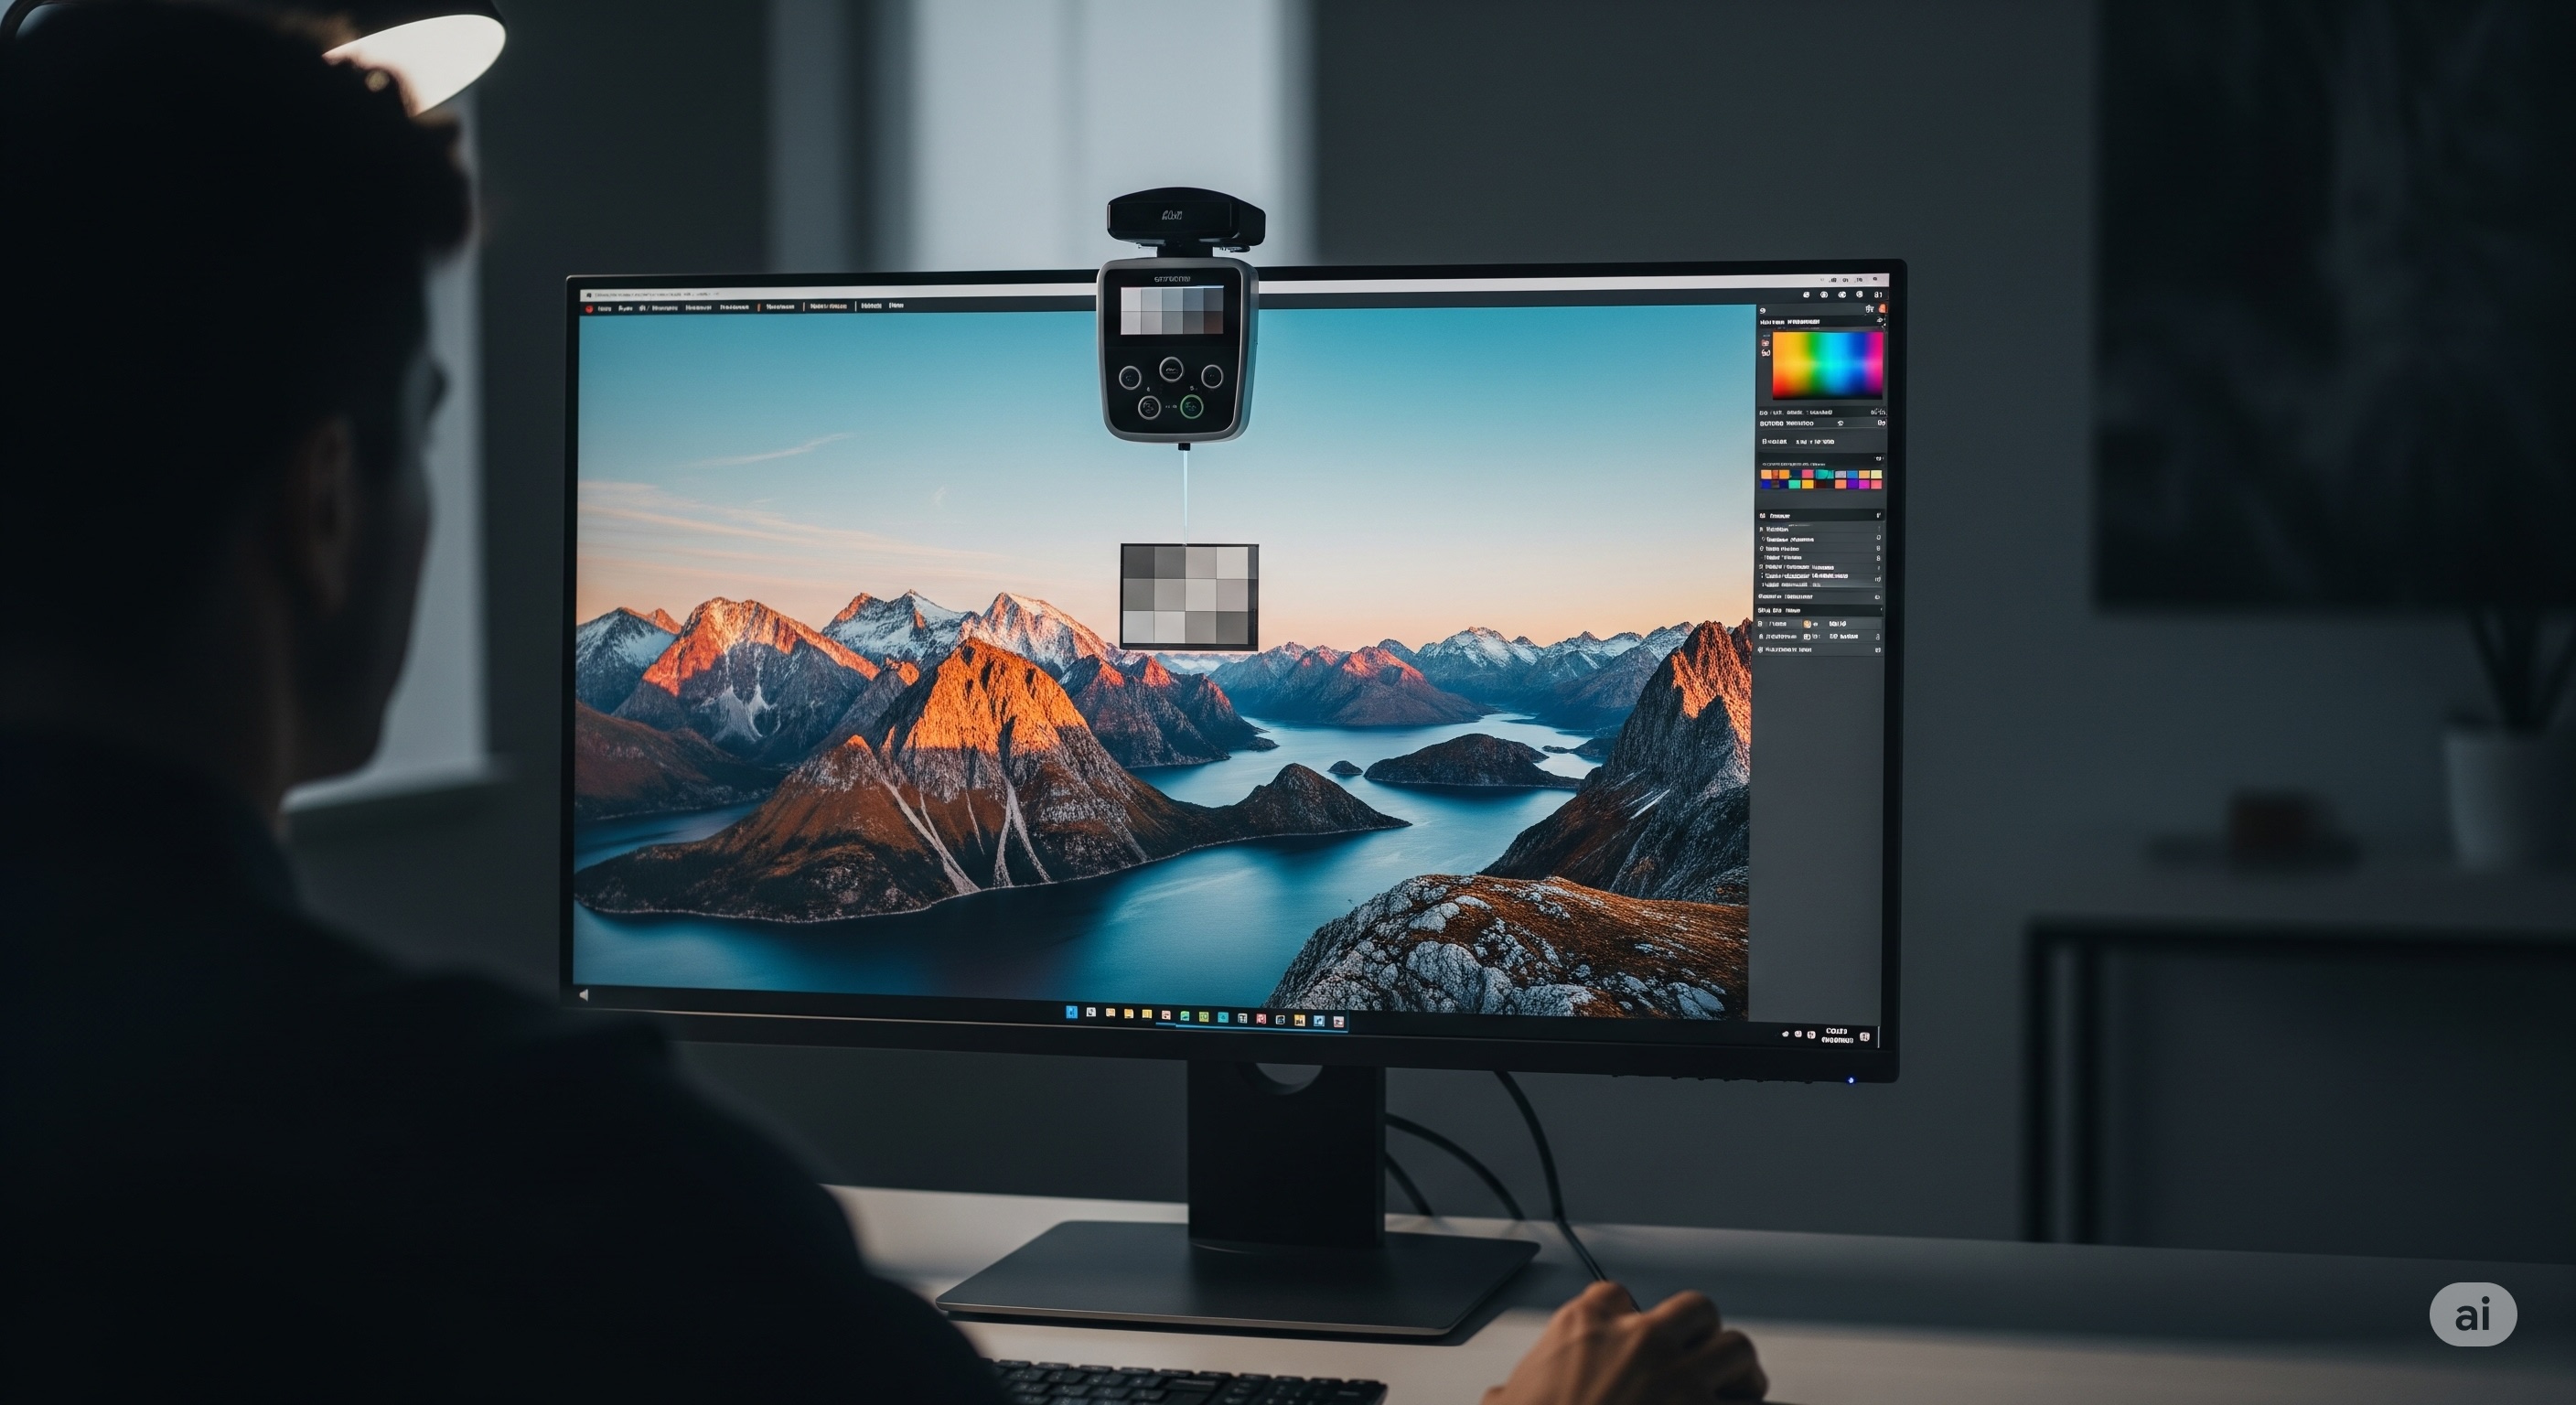
While software calibration is a great first step, it's limited by the subjectivity of human vision. For true accuracy, you need a hardware device called a colorimeter or spectrophotometer. This small device hangs over your screen and objectively measures the actual colors your monitor produces. It then communicates with its software to create a highly accurate and customized ICC (International Color Consortium) profile for your specific display in its specific lighting environment.
Why It's Superior:
- Objectivity: It replaces subjective human perception with precise, scientific measurement.
- Accuracy: It measures the monitor's full color gamut and characteristics, creating a far more detailed and accurate profile.
- Consistency: It allows you to calibrate multiple displays to the same standard, ensuring a consistent look across your entire setup.
The Process:
While specific steps vary by manufacturer (popular brands include Calibrite and Datacolor), the general process is universal and surprisingly simple:
- Install the software that came with your calibration device.
- Plug the device into a USB port on your computer.
- The software will prompt you to choose your calibration targets (gamma, white point, luminance). For most users, the defaults (Gamma 2.2, White Point D65, Luminance 120 cd/m²) are perfect.
- Hang the device on your screen in the designated area.
- The software will then automatically flash a series of color patches on the screen. The device measures each one, compares it to the target value, and builds the correction profile. The whole process usually takes about five minutes.
- Once complete, the software will save the new ICC profile and set it as your system default. Many will even show you a before-and-after comparison.
Post-Calibration: How to Verify and Maintain Your Results
Calibration isn't a "set it and forget it" task. Your monitor's backlight and color performance will drift over time. Here’s how to ensure your screen stays accurate.
How Often Should You Recalibrate?
For professional work, it's recommended to recalibrate your monitor every 2-4 weeks to account for any drift. For general use or gaming, recalibrating every 2-3 months is more than sufficient to maintain a high level of accuracy.
What Calibration Can't Fix
It's vital to understand the limitations of calibration. It is a powerful tool for correcting color and gamma, but it cannot fix physical panel defects or performance issues. For example, if you notice blurry trails or smearing during fast-motion scenes in games, that's an issue with your monitor's pixel response time. To diagnose this, you'll need to use a ghosting test and adjust your monitor's overdrive settings, a process we detail in our complete guide to fixing monitor ghosting. Similarly, calibration won't fix poor text rendering; for that, you should check your sharpness settings with a dedicated text clarity test.
Conclusion: Take Control of Your Visual World
Monitor calibration is the unsung hero of a high-quality visual experience. It's the crucial, final step that ensures the hardware you invested in is performing at its absolute best. By moving from an uncalibrated, factory-default state to a properly profiled display, you are guaranteeing a more accurate, consistent, and enjoyable experience, whether you're editing a masterpiece, conquering a virtual world, or simply browsing the web.
You are now fully equipped with the knowledge to tackle this task. Start with the free software tools built into your operating system—the improvement will be immediate and noticeable. If your work or passion demands the utmost precision, investing in a hardware colorimeter is one of the best upgrades you can make for your entire setup. Stop accepting "close enough" and take control of your color today. Your eyes will thank you.